Character Image Creation Guide
Learn how to create character images to overlay on recruitment images, from downloading templates to registering your work.
About Character Images
This feature is exclusive to the Plus plan.
A character image is placed on top of the recruitment image at its original size. Transparent areas reveal the elements below (background, title, description, member icons, and frame), while opaque areas cover them.
This means you can go beyond swapping the character: by covering the frame or background with your own design, you can customize the entire look of the recruitment image.
Download Templates
These templates use color coding to show where each element appears in the recruitment image. Use them as an underlay while creating your images.
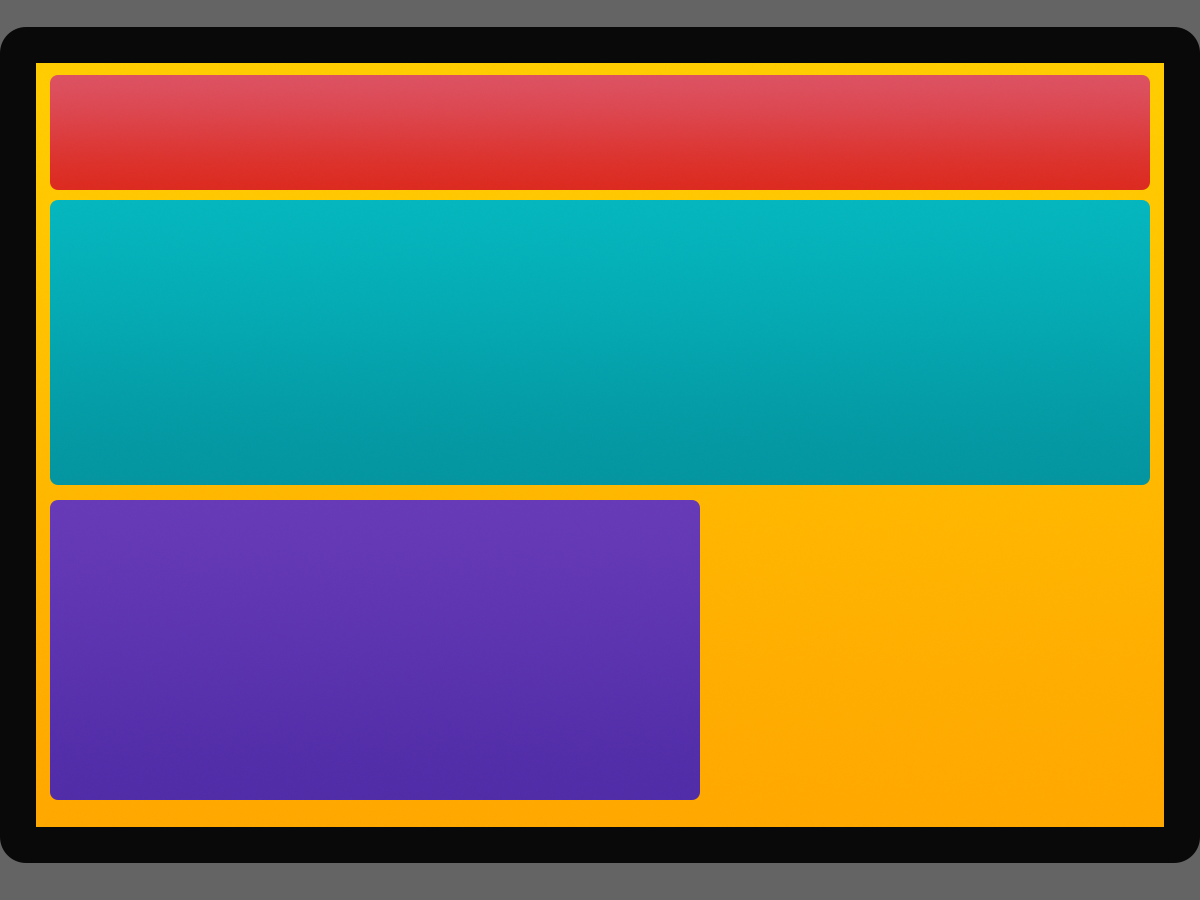
Download the template (with title)

Download the template (without title)
Color Legend
| Color | Area |
|---|---|
| Black | Frame |
| Red | Title |
| Cyan | Description |
| Green | Extended description area when there is no title |
| Purple | Member icon area |
| Yellow | Background image |
| Gray | Transparent (not part of the output image) |
In recruitments without a title, the description area extends upward into the green area. We recommend a design that works both with and without a title.
Creating Your Images
- Create a new PNG image with a transparent background at 1200×900px, the same size as the templates
- Place your character using a template as an underlay. We recommend keeping the title, description, and member icon areas uncovered
- Prepare three images: Recruiting, Full, and Ended. Using the same image for all three is fine
Image Requirements
| Item | Requirement |
|---|---|
| Format | PNG (animated PNG is not supported) |
| Size | Exactly 1200×900px |
| File size | Max 3MB per image |
| Count | Three images: Recruiting, Full, and Ended |
Registering and Applying
Select /config → Register or Reset Character Images, then upload all three images (Recruiting, Full, and Ended) at once. Registration fails if any of them is missing.
Once registered, go to /config → Recruitment Image Settings and set Character to "Custom" to apply your images to recruitment images.
- Resetting returns the character setting to "Monvoke"
- If the Plus plan becomes inactive, the registered images are reset automatically
For details on server settings, see "Server Settings" in Features.